

How To Upload A File With Html
CodeIgniter File Upload
File management is essential to most web applications. If you are developing a content management organisation, then you volition need to exist able to upload images, discussion documents, pdf reports, etc. If you lot are working on a membership site, you may need to take a provision for people to upload their profile images. CodeIgniter's File Uploading course makes it piece of cake for us to exercise all of the to a higher place.
In this tutorial, we will look at how to use the file upload library to load files.
Uploading Images in CodeIgniter
File uploading in CodeIgniter has two main parts. The frontend and the backend. The frontend is handled by the HTML course that uses the class input type file. On the backend, the file upload library processes the submitted input from the form and writes it to the upload directory.
Let's brainstorm with the input form.
Create a new directory chosen files in application/views directory
Add together the following files in application/views/files
- upload_form.php – this view contains the HTML form that has the input blazon of file and submits the selected file to the server for processing
- upload_result.php – this view displays the results of the uploaded prototype including a link that we can click to view the results.
Add the following lawmaking to upload_form.php
<!DOCTYPE html> <html> <head> <championship>CodeIgniter Image Upload</title> <meta charset="UTF-8"> <meta name="viewport" content="width=device-width, initial-calibration=1.0"> </caput> <trunk> <div> <h3>Select an image from your computer and upload information technology to the cloud</h3> <?php if (isset($error)){ echo $fault; } ?> <form method="post" action="<?=base_url('store-image')?>" enctype="multipart/class-data"> <input type="file" id="profile_image" name="profile_image" size="33" /> <input type="submit" value="Upload Image" /> </course> </div> </trunk> </html> Here,
- if (isset($mistake)){…} checks if the fault variable has been prepare. If the result is truthful and then the error returned by the upload library is displayed to the user.
- <input type="file" id="profile_image" name="profile_image" size="33″ /> the blazon file allows the user to browser to their computer and select a file for uploading.
Ad the following lawmaking to upload_result.php
<!DOCTYPE html> <html> <head> <championship>Image Upload Results</title> <meta charset="UTF-eight"> <meta name="viewport" content="width=device-width, initial-scale=i.0"> </head> <trunk> <div> <h3>Congratulations, the paradigm has successfully been uploaded</h3> <p>Click hither to view the epitome you just uploaded <?=ballast('images/'.$image_metadata['file_name'], 'View My Image!')?> </p> <p> <?php echo anchor('upload-epitome', 'Become back to Paradigm Upload'); ?> </p> </div> </trunk> </html> HERE,
- <?=ballast('images/'.$image_metadata['file_name'], 'View My Epitome!')?> uses the anchor helper to create a link to the new uploaded file in the images directory. The proper name is retrieved from the prototype metadata that is passed to the view when the file has successfully been uploaded.
Let's now create the controller that will respond to our image uploading
Add together a new file ImageUploadController.php in application/controllers
Add the post-obit code to ImageUploadController.php
<?php defined('BASEPATH') OR exit('No direct script access allowed'); class ImageUploadController extends CI_Controller { public function __construct() { parent::__construct(); $this->load->helper('url', 'form'); } public function index() { $this->load->view('files/upload_form'); } public part store() { $config['upload_path'] = './images/'; $config['allowed_types'] = 'gif|jpg|png'; $config['max_size'] = 2000; $config['max_width'] = 1500; $config['max_height'] = 1500; $this->load->library('upload', $config); if (!$this->upload->do_upload('profile_image')) { $error = assortment('error' => $this->upload->display_errors()); $this->load->view('files/upload_form', $error); } else { $data = array('image_metadata' => $this->upload->data()); $this->load->view('files/upload_result', $data); } } } HERE,
- class ImageUploadController extends CI_Controller {…} defines our controller grade and extends the base of operations controller CI_Controller
- public role __construct() {…} initializes the parent constructor method and loads the url and course helpers
- public role alphabetize() {…} defines the alphabetize method that is used to brandish the image upload form
- public part store() {…} defines the method that will upload the prototype and shop it on the web awarding server.
- $config['upload_path'] = './images/'; sets the directory where the images should be uploaded
- $config['allowed_types'] = 'gif|jpg|png'; defines the acceptable file extensions. This is of import for security reasons. The allowed types ensures that but images are uploaded and other file types such as php cant be uploaded considering they accept the potential to compromise the server.
- $config['max_size'] = 2000; set the maximum file size in kilobytes. In our case, the maximum file that can exist uploaded is 2,000kb close to 2MB. If the user tries to upload a file larger than 2,000kb, then the image will fail to upload and the library will render an fault message.
- $config['max_width'] = 1500; sets the maximum width of the image which in our instance is 1,500 px. Whatever width larger than that results in an error
- $config['max_height'] = 1500; defines the maximum acceptable tiptop.
- $this->load->library('upload', $config); loads the upload library and initializes it with the array $config that we defined above.
- if (!$this->upload->do_upload('profile_image')) {…} attempts to upload the submitted epitome which in our instance is named profile_image
- $mistake = array('fault' => $this->upload->display_errors()); sets the fault message if the upload fails
- $this->load->view('files/upload_form', $error); loads the file upload form and displays the error message that is returned from the upload library
- $data = assortment('image_metadata' => $this->upload->data()); sets the prototype metadata if the upload has been successful
- $this->load->view('files/upload_result', $information); loads the uploaded successfully view and passes the uploaded file metadata.
That is it for the controller. Let's now create the directory where our images volition be uploaded to. Create a new directory "images" in the root directory of your application
Finally, we will advertizing two routes to our routes.php file that will display the form and display results
Open application/config/routes.php Add the following routes $road['upload-image'] = 'imageuploadcontroller'; $road['store-prototype'] = 'imageuploadcontroller/store';
HERE,
- $route['upload-paradigm'] = 'imageuploadcontroller'; defines the URL upload-image that calls the alphabetize method of ImageUploadController
- $route['store-image'] = 'imageuploadcontroller/store'; defines the URL store-epitome that accepts the selected user file and uploads it to the server.
Testing the awarding
Let's offset the born PHP server
Open the concluding/ command line and scan to the root of your application. In my case, the root is located in drive C:\Sites\ci-app
cd C:\Sites\ci-app
start the server using the following command
php -S localhost:3000
Load the following URL in your spider web browser: http://localhost:3000/upload-paradigm
you will exist able to see the following results

Click on cull file
You should be able to see a dialog window like to the following

Select your desired image and so click on open up

The selected file name volition show up in the form upload as shown in the image higher up. Click on an upload prototype push button
You will get the post-obit results assuming everything goes well

Click on View My Image! Link
Yous should be able to meet the image that y'all uploaded. The results volition be similar to the following
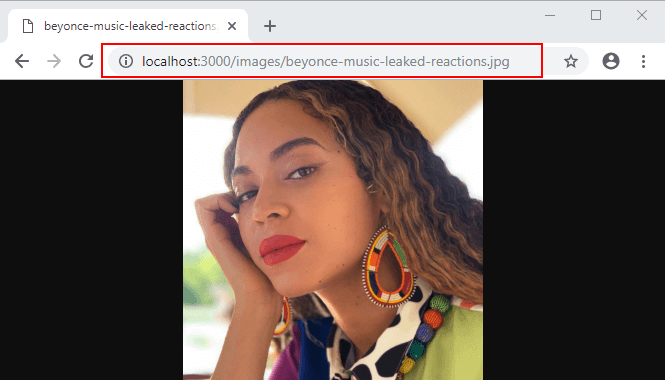
Notice uploaded image name is displayed in the URL. We got the image name from the uploaded epitome metadata
Note: The File Upload process remains the same for other types of files
Source: https://www.guru99.com/codeigniter-file-upload.html
Posted by: wadsworththentim.blogspot.com
0 Response to "How To Upload A File With Html"
Post a Comment